In v9.1 of Aurora Files we have added chat feature. This is implemented by providing integration with RocketChat, free opensource chat solution. To use chat in Aurora Files you need to install RocketChat and configure its integration module from Aurora admin interface.
Installing RocketChat
To install RocketChat, follow the official installation instructions. Make sure your system meets minimal system requirements.
While it's possible to install RocketChat and Aurora Files on the same server, we recommend running RocketChat on a separate system. We have used DigitalOcean droplets for this purpose, with Debian installed there; RocketChat documentation contains installation guide for Debian.
Currently, we recommend installing RocketChat on Ubuntu or Debian with snap as shown here. Also, if you're on DigitalOcean, there's a one-click install option available. Similar options can be used with other cloud providers.
Starting from version 9.7.0 of Aurora Files, we fully support the latest version 6.x of RocketChat, as well as the previous 5.x. If you run a previous version of Aurora, installing version 4.x of RocketChat is recommended, it can be installed as follows:
snap install --channel=4.x/stable rocketchat-server
RocketChat does not offer SSL/HTTPS support, but it's possible to provide HTTPS by setting up a reverse proxy, and we strongly recommend doing so. One of the options is installing nginx webserver and setting up reverse proxy there. You can use your existing SSL certificate, create a self-signed one, or generate one using Let's Encrypt. If you choose to go with Let's Encrypt certbot, your certificate settings in nginx configuration will be something like:
    ssl_certificate /etc/letsencrypt/live/chat.yourdomain.com/fullchain.pem;
    ssl_certificate_key /etc/letsencrypt/live/chat.yourdomain.com/privkey.pem;
If you wish to force redirect from HTTP to HTTPS, that's done by adding the following section to nginx config:
server {
    listen 80;
    server_name _;
    return 301 https://$host$request_uri;
}
Note that you can follow the instructions on configuring Let's Encrypt reverse proxy. Redirecting from HTTP to HTTPS can be enforced there automatically if you wish.
If you installed RocketChat with snap, you can have SSL/https enabled automatically there.
How chat integration works
Once you have chat integration enabled (see the next section), chat accounts will automatically be created for users of your Aurora Files installation.
Chat account uses Aurora account's email/password as credentials. The username will be generated based on email address - by default, it's username part and the first word of the domain part, separated with a dot.
For example, chat user for myname@thedomain.co.uk will be created with myname.thedomain username.
Starting from version 9.7.0 of Aurora Files, you can change username format and how it's mapped against email address. It's done by setting ChatUsernameFormat option in data/settings/modules/RocketChatWebclient.config.json configuration file:
- 0 - chat username equals username part of email address,
e.g. myname username for myname@thedomain.co.uk email - 1 (default behavior) - username part and the first word of the domain part, separated with a dot,
e.g. myname.thedomain username for myname@thedomain.co.uk email - 2 - username part and the domain part, separated with a dot,
e.g. myname.thedomain.co.uk username for myname@thedomain.co.uk email
NB: Bear in mind that changing user's email address, username or password through RocketChat admin or user interface may result in being unable to log into chat from Aurora. That's why in our integration we're blocking features like changing account data or password reset.
Setting up integration with RocketChat
When you have RocketChat installation up and running, available over HTTPS and with admin user assigned, you can proceed with configuring chat integration of Aurora Files. First of all, make sure Disabled is set to false in data/settings/modules/RocketChatWebclient.config.json configuration file.
The rest of the configuration options are set from within adminpanel. You need to supply RocketChat installation URL, admin username and password:
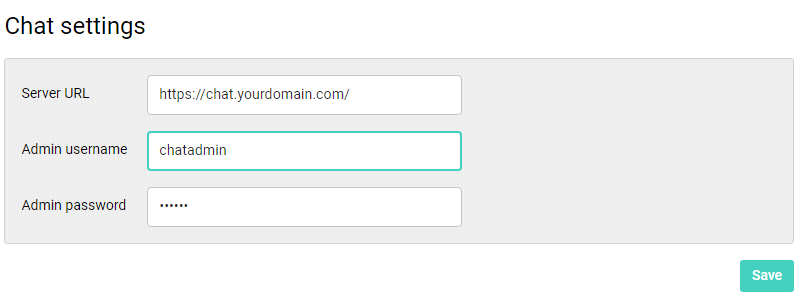
Please note that admin password is stored in the configuration file in encrypted fashion. Thus, editing it directly in config will not work, you need to supply password using this screen of admin interface.
Save setting and proceed to the next area. Some of RocketChat configuration options need to be adjusted, for integration to work correctly:
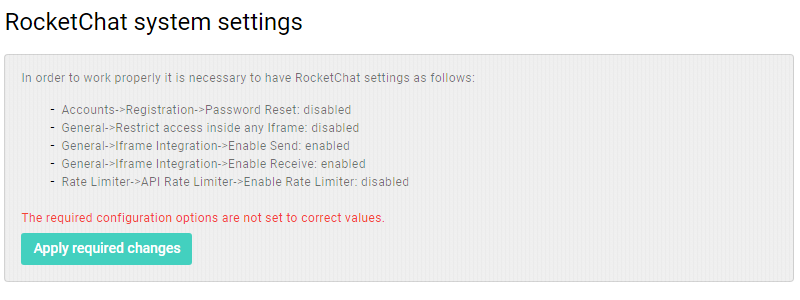
The last area of chat integration settings is optional, but we strongly recommend applying those settings as well. In there, we set default text on home page and site name, and we also change the visual styles to resemble default colors of Aurora Files design:

Styles and site name are copied from Aurora Files installation, so if you reconfigure the product in the future, make sure to apply these changes here again.
Using chat
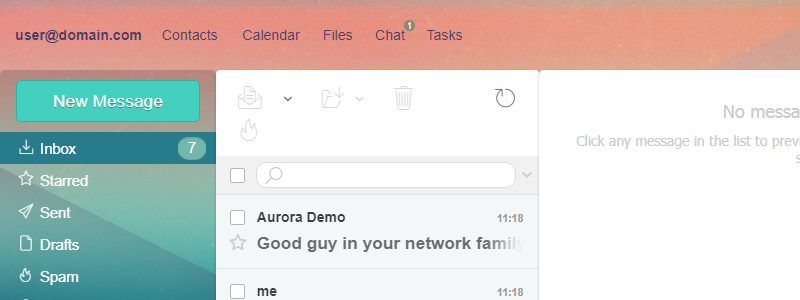
Once you have chat integration enabled, users will be able to access Chat from within Aurora Files interface:
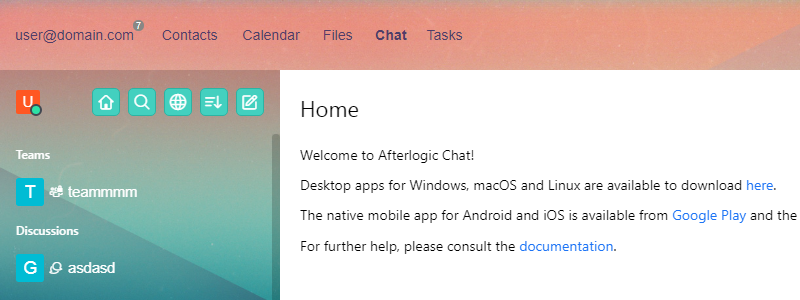
If user currently has another tab open in Aurora Files interface, Chat tab will show a number of unread messages:
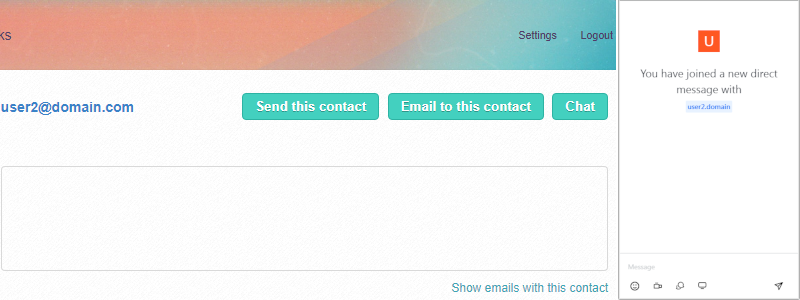
Users can also message each other from within Team section of Contacts screen, clicking Chat button there will open a popup window - and recipient's chat account will automatically be created, if it doesn't exist yet:
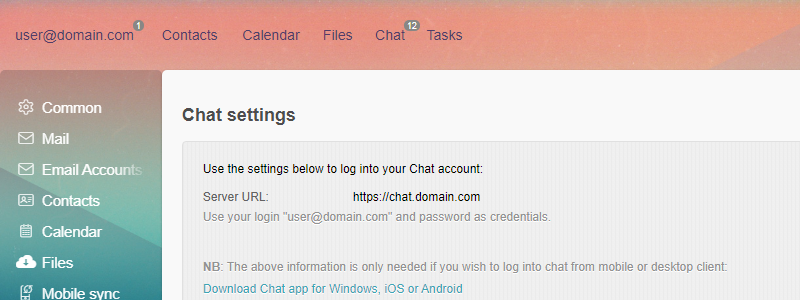
Under Settings screen, users will find their access details for logging into RocketChat installation; these data will only be needed for those willing to use RocketChat desktop or mobile application:
 MailBee.NET Objects .NET email components: SMTP, POP3, IMAP, EWS, Security, AntiSpam, Outlook, Address Validator, PDF
  MailBee.NET Queue Easy-to-use .NET service to deliver e-mails in the background
  MailBee Objects ActiveX email components: SMTP, POP3, IMAP, S/MIME
  MailBee Message Queue Queue-based background sending of emails
  WebMail Pro PHP Webmail front-end for your existing mail server, with personal calendar, contacts, and mobile sync
  WebMail Pro ASP.NET Webmail front-end for your existing mail server, with calendar sharing and global contacts
  ActiveServer Premium addon which brings ActiveSync support to WebMail Pro and Aurora
  Aurora Corporate Groupware system for businesses and providers
  Aurora Files Your personal cloud storage
  Triton Transactional and newsletter emails sending solution
  MailSuite Pro for Linux Mail server (MTA) bundled with WebMail Pro for a complete solution
  Unified Messaging Solution Technology platform which provides telecom users with a feature-rich messaging portal


