For hosting providers
You can easily install WebMail Pro on Plesk Panel server as a fast and neat replacement or alternative to the built-in webmail client.
It's assumed that you install WebMail Pro to some primary domain (webhosting.com). All your clients will be able to check their Plesk e-mail accounts using a single instance of WebMail Pro (webhosting.com/webmail). To learn more, refer to How to install the product on Plesk Panel server.
Note that "Change password" option is supported out-of-box.
For hosting clients
If your hosting provider has installed WebMail Pro on their server (for example, webhosting.com/webmail), navigate to that URL and enter your e-mail address and password to check your Plesk e-mail account.
When logged in the webmail interface, you can also change your Plesk e-mail account password in Settings area.
How to install the product on Plesk Panel server
If you're a hosting provider and want to install a single instance of WebMail Pro (the instance which will be used by all your clients to check their Plesk e-mail accounts), follow the instructions below:
Update on Plesk Panel v11-12.*:
APS Catalog used in current version already includes a package for WebMail Pro. Thus, steps 1-5 are not required there.
1. Download Plesk Panel Application of WebMail Pro on your local computer. With the download, you'll also be issued a trial license key. Store it for later use (unless you already have a permanent key).
2. In Plesk Panel, navigate to "Tools & Utilites" -> "Application Vault" and click "Uploaded Apps".
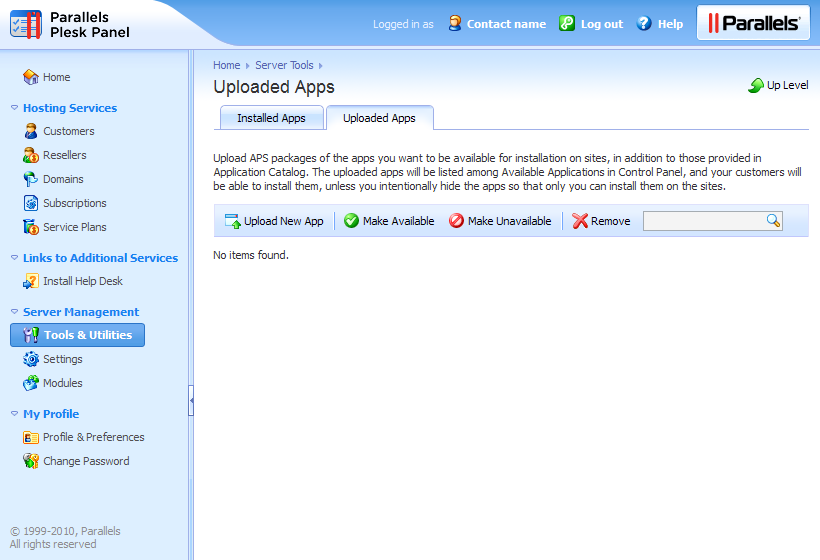
3. Click "Upload New App", then click Browse and locate afterlogic-webmail-pro-plesk.zip file on your local computer.

4. Clear "Available to customers" checkbox unless you want your clients to be able to install their own copies of WebMail Pro on their domains.
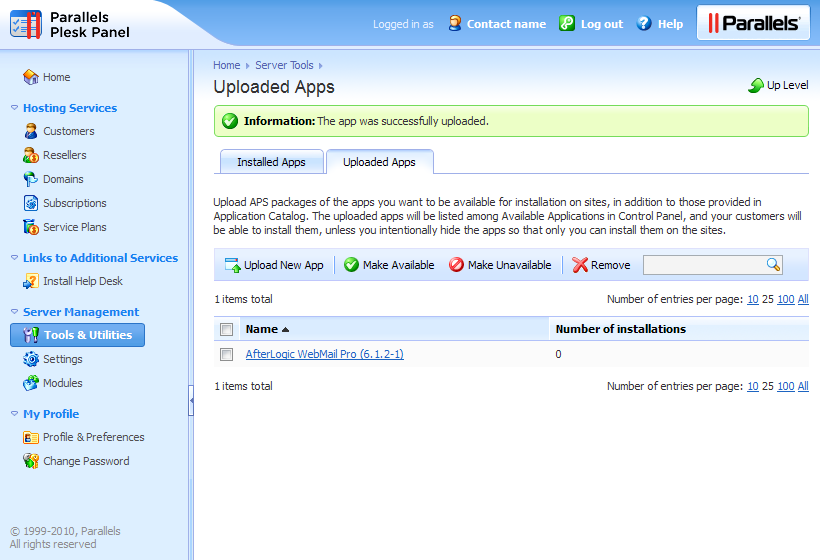
5. Click Upload to add WebMail Pro into Application Vault.
The WebMail Pro application should now appear in the list of uploaded apps.
6. Navigate to "Hosting Services" -> "Domains".
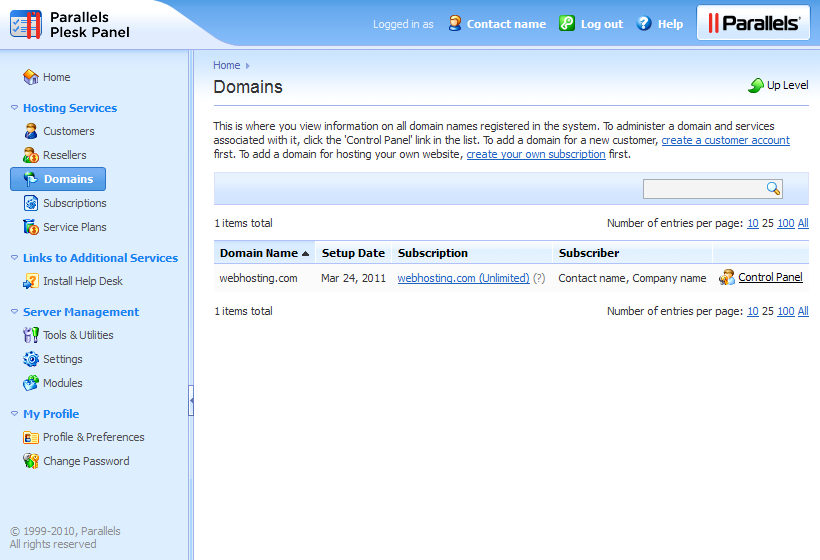
7. Select the domain where to install WebMail Pro, and click the "Control Panel" link of that domain.
8. In the Control Panel of the domain, click Applications tab, and select "All Available Applications" option.
9. In "Collaboration, E-mail" section, click "AfterLogic WebMail Pro" link, then click Install to start the installation process.
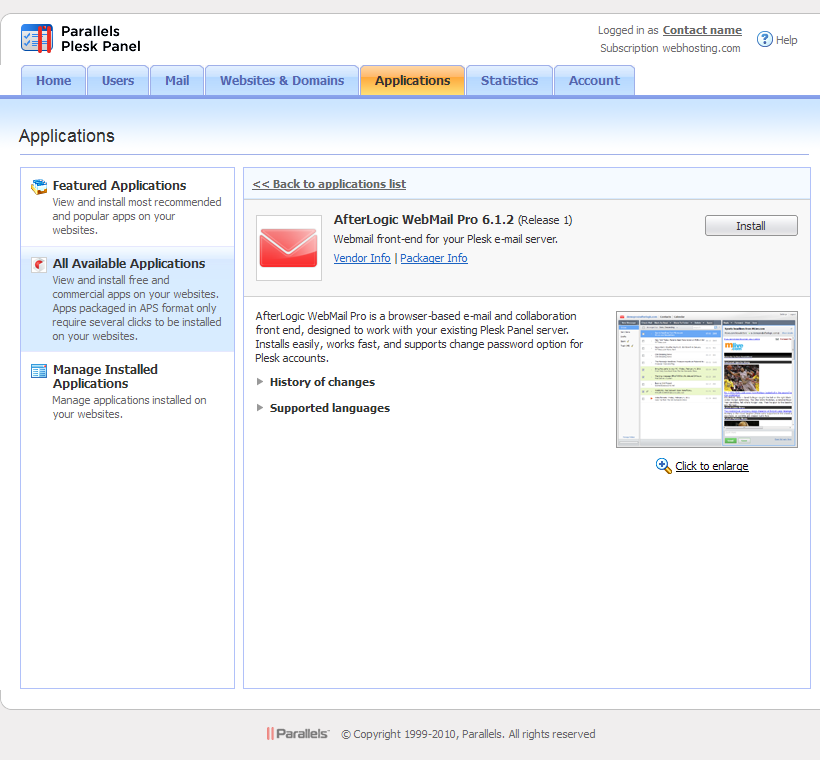
10. Accept the license agreement terms to proceed.
11. The main screen of the installation process appears. Specify the URL your clients will use to access WebMail Pro.
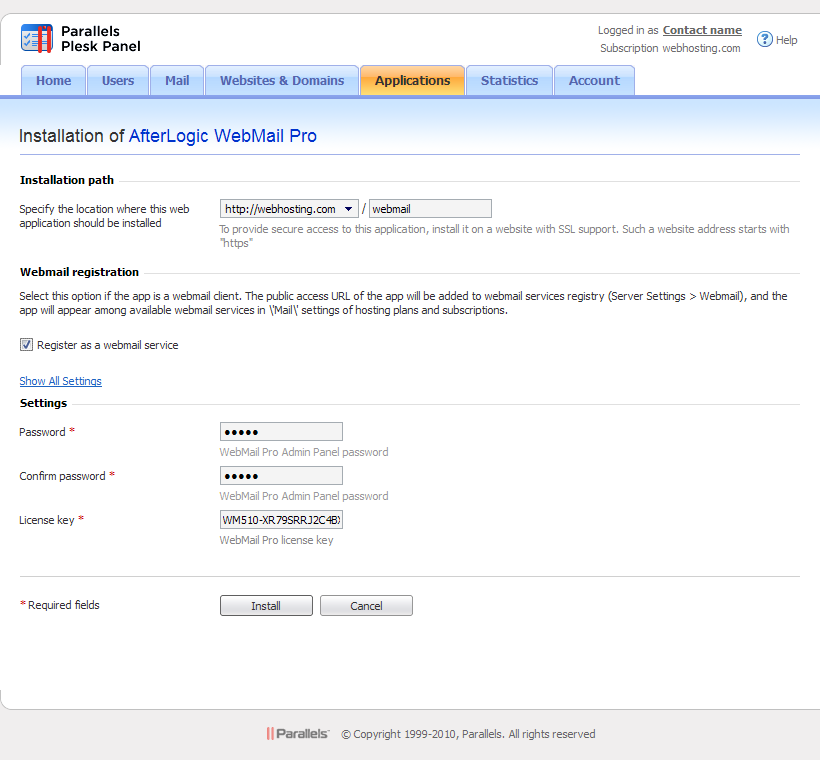
12. (OPTIONAL) Click "Show All Settings" link if you want to configure the default login name for Admin Panel access, database name, etc. However, you can leave all these settings in their default state.
13. Specify the password to access Admin Panel of WebMail Pro. The default login name is "mailadm".
14. Confirm the password for "mailadm".
15. Specify WebMail Pro license key. If you do not have one, you can get it from AfterLogic web site.
16. Click Install. The installation process should then complete in a few moments.
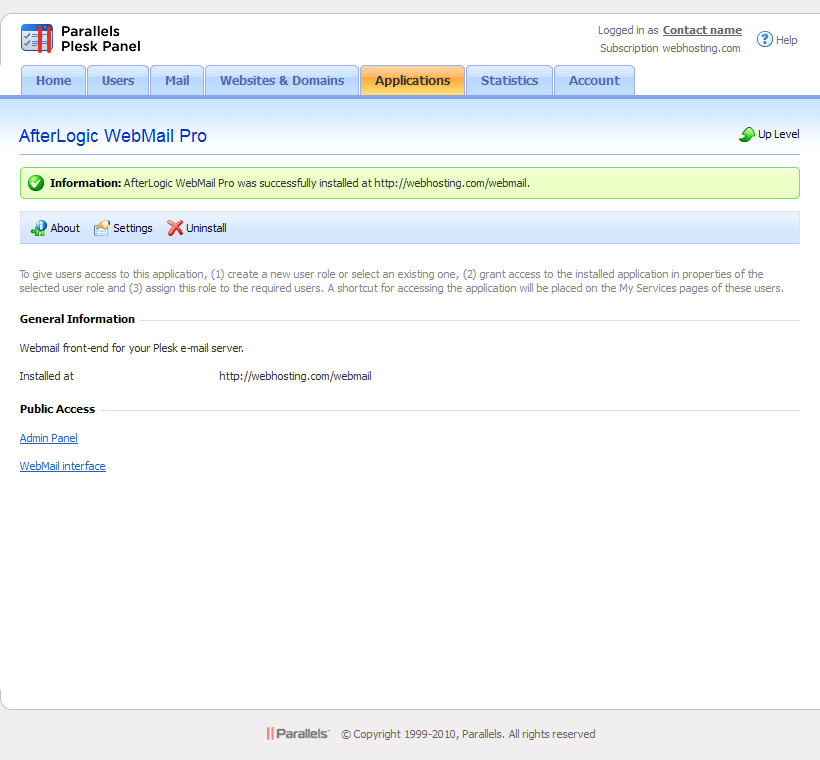
17. WebMail Pro is ready for use. Anybody who has an e-mail account on your Plesk Panel server can now check their e-mail at "Installed at" URL.
18. (OPTIONAL) If you wish to fine-tune WebMail Pro (e.g. change the default skin, language, configure log files, and so on), you can click Admin Panel link, log in as "mailadm", and perform any additional configuration of the product. However, this is completely optional.
NOTE: If you didn't clear "Available to customers" checkbox when adding WebMail Pro into Application Vault, your hosting clients will be able to install their own instances of WebMail Pro onto their domains and manage them independently.
 MailBee.NET Objects .NET email components: SMTP, POP3, IMAP, EWS, Security, AntiSpam, Outlook, Address Validator, PDF
  MailBee.NET Queue Easy-to-use .NET service to deliver e-mails in the background
  MailBee Objects ActiveX email components: SMTP, POP3, IMAP, S/MIME
  WebMail Pro PHP Webmail front-end for your existing mail server, with personal calendar, contacts, and mobile sync
  ActiveServer Premium addon which brings ActiveSync support to WebMail Pro and Aurora
  Aurora Corporate Groupware system for businesses and providers
  Triton Transactional and newsletter emails sending solution
  MailSuite Pro for Linux Mail server (MTA) bundled with WebMail Pro for a complete solution
  Unified Messaging Solution Technology platform which provides telecom users with a feature-rich messaging portal
