WebMail Pro (ASP.NET) supports integration with hMailServer. This integration allows users to change passwords for their email accounts from within WebMail Pro interface. It also allows for using autoresponder feature.
NB: This integration was originally developed for use with IMAP accounts, we do not recommended using it for POP3 access.
Configuring access to hMailServer
Create new file Plugins\hMailServer.ini and edit it so that it holds two lines:
user=user
password=password
Username and password of hMailServer administrative account should be supplied there. Default username is Administrator, password is supplied during hMailServer installation.
Deploying DLLs
Interop.hMailServer.dll (by default, found at C:\Program Files\hMailServer\Bin\) should be copied to bin subfolder of WebMail Pro.
NB: The DLL is currently available for 32-bit only. If you have IIS running in 64-bit mode, be sure to set "Enable 32-bit Applications" to true in application pool settings.
You'll also need to download and place the following files:
- Plugins\AutoresponderPlugin.dll
- Plugins\ChangePasswordPlugin.dll
- Plugins\HMailServerDomainPlugin.dll
Configuring domains
Integration will only work with the domains explicitly added to AdminPanel, it will not work for accounts under default domain (for instance, those added via Advanced Login). Moreover, you need to make sure "Override default domain settings" option is checked for the domain(s) in question.
Upon enabling the integration, you need to apply it for those domains, that's done by opening the settings and simply clicking Save (not required for the domains added after enabling the integration). There's a chance you'll get a permission error upon doing that, please see the next section in this regard.
Setting access permissions for the DLL
WebMail Pro is using COM object provided by Interop.hMailServer.dll mentioned above. The problem is that by default COM object can only activated by the following accounts:
- Administrator
- System
- Interactive
When you are running your ASP.NET account on Windows XP, your web application is running as the ASPNET account. The way to resolve this issue is to edit the DCOM configuration settings for the object.
- Go to the Start-Run menu item.
- Type in "DCOMCNFG" and hit enter.
- This should load the "Component Services" MMC (you can also load from "Administrative Tools - Component Services")
- Expand "Component Services"
- Expand "Computers"
- Expand "My Computer"
- Select the "DCOM Config" item
- Select the "hMailServer" item.
- Right click and select Properties
- Select the Security Tab and you should see the following:
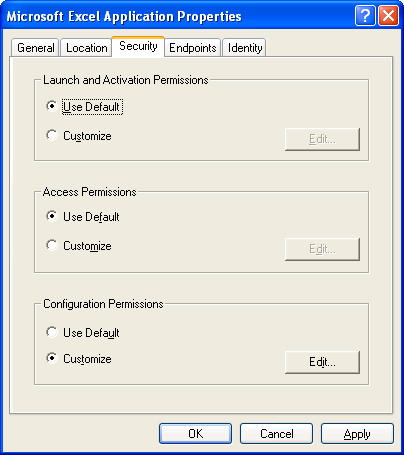
- Under "Launch and Activation Permissions" select the "Customize" option.
- Click the "Edit" button
| Windows XP | Windows 2003 Server |
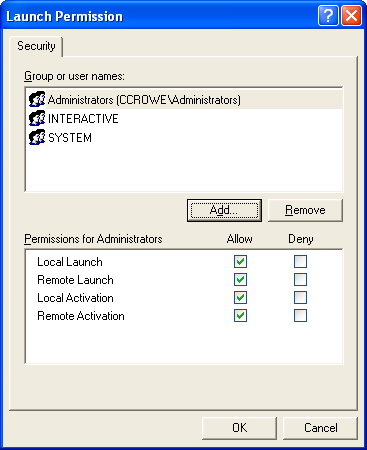 | 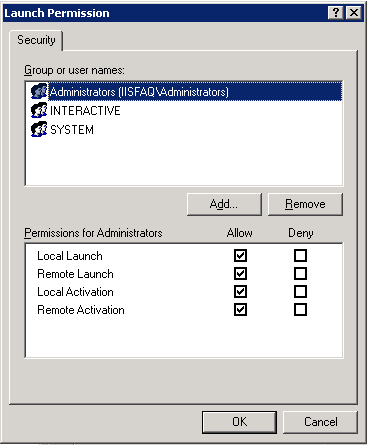 |
- Click the "Add" button to add a new account to the list.
- On the dialog that is displayed click the Locations button
(this is because by default your domain will be selected and we need a local account)
In this dialog scroll the list to the top (sometimes the first item is not visible) but scroll to the top and select the first item which is your computer name.
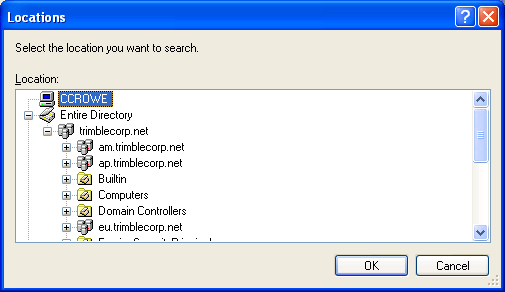
- Click the OK button
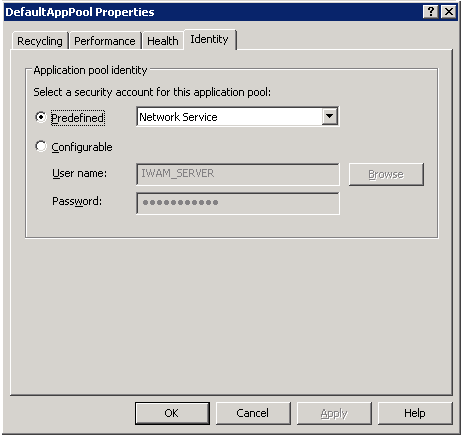
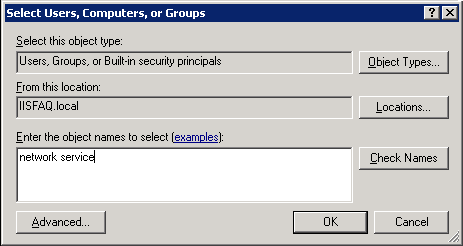
- On the dialog that is displayed enter "ASPNET" as the account name (make sure location is set to the name of the computer that IIS is on) on Windows XP or if you are running on Windows 2003 Server you must enter the account that the Application Pool is running as, by default "Network Service"
| Windows XP | Windows 2003 Server |
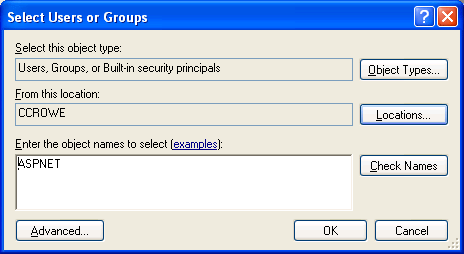 | Note: A quicker way on Windows XP is to just enter the computer name and the account (ComputerName\ASPNET)
 |
- Click the OK button
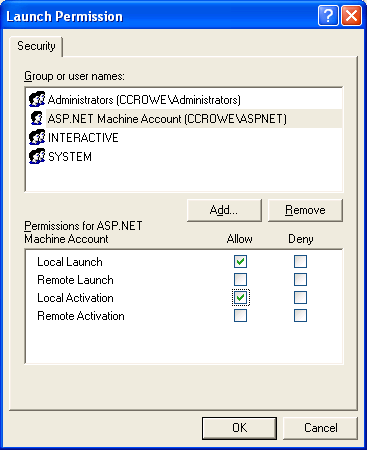
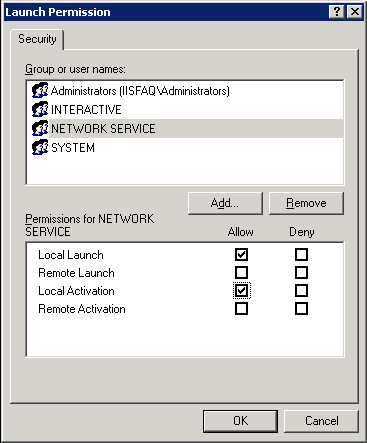
- Now make sure you select the following options for the "ASP.NET Machine Account" or the account that is the application pool identity ( by default Network Service)
- Local Launch : Allow
- Remote Launch : [blank]
- Local Activation : Allow
- Remote Activation : [blank]
These settings can be seen below:
| Windows XP | Windows 2003 Server |
 |  |
- Click the OK button and make sure everything works fine.
Remember if you are running on Windows 2003 Server you must use the application pool identity as the account and not the ASPNET account.
 MailBee.NET Objects .NET email components: SMTP, POP3, IMAP, EWS, Security, AntiSpam, Outlook, Address Validator, PDF
  MailBee.NET Queue Easy-to-use .NET service to deliver e-mails in the background
  MailBee Objects ActiveX email components: SMTP, POP3, IMAP, S/MIME
  MailBee Message Queue Queue-based background sending of emails
  WebMail Pro PHP Webmail front-end for your existing mail server, with personal calendar, contacts, and mobile sync
  WebMail Pro ASP.NET Webmail front-end for your existing mail server, with calendar sharing and global contacts
  ActiveServer Premium addon which brings ActiveSync support to WebMail Pro and Aurora
  Aurora Corporate Groupware system for businesses and providers
  Aurora Files Your personal cloud storage
  Triton Transactional and newsletter emails sending solution
  MailSuite Pro for Linux Mail server (MTA) bundled with WebMail Pro for a complete solution
  Unified Messaging Solution Technology platform which provides telecom users with a feature-rich messaging portal


